Architectural metalwork
Voronoi wall
A large stainless-steel Voronoi structure — from parametric drawing to laser-scanned site survey to installation on a hinged frame system.
Client
Confidential
Year
2025–2026
Role
Design, survey, fabrication lead
Tools
Rhinoceros · SolidWorks · Leica 3D Disto · Stainless steel
Process
How it came together
Step 01
Iterative design
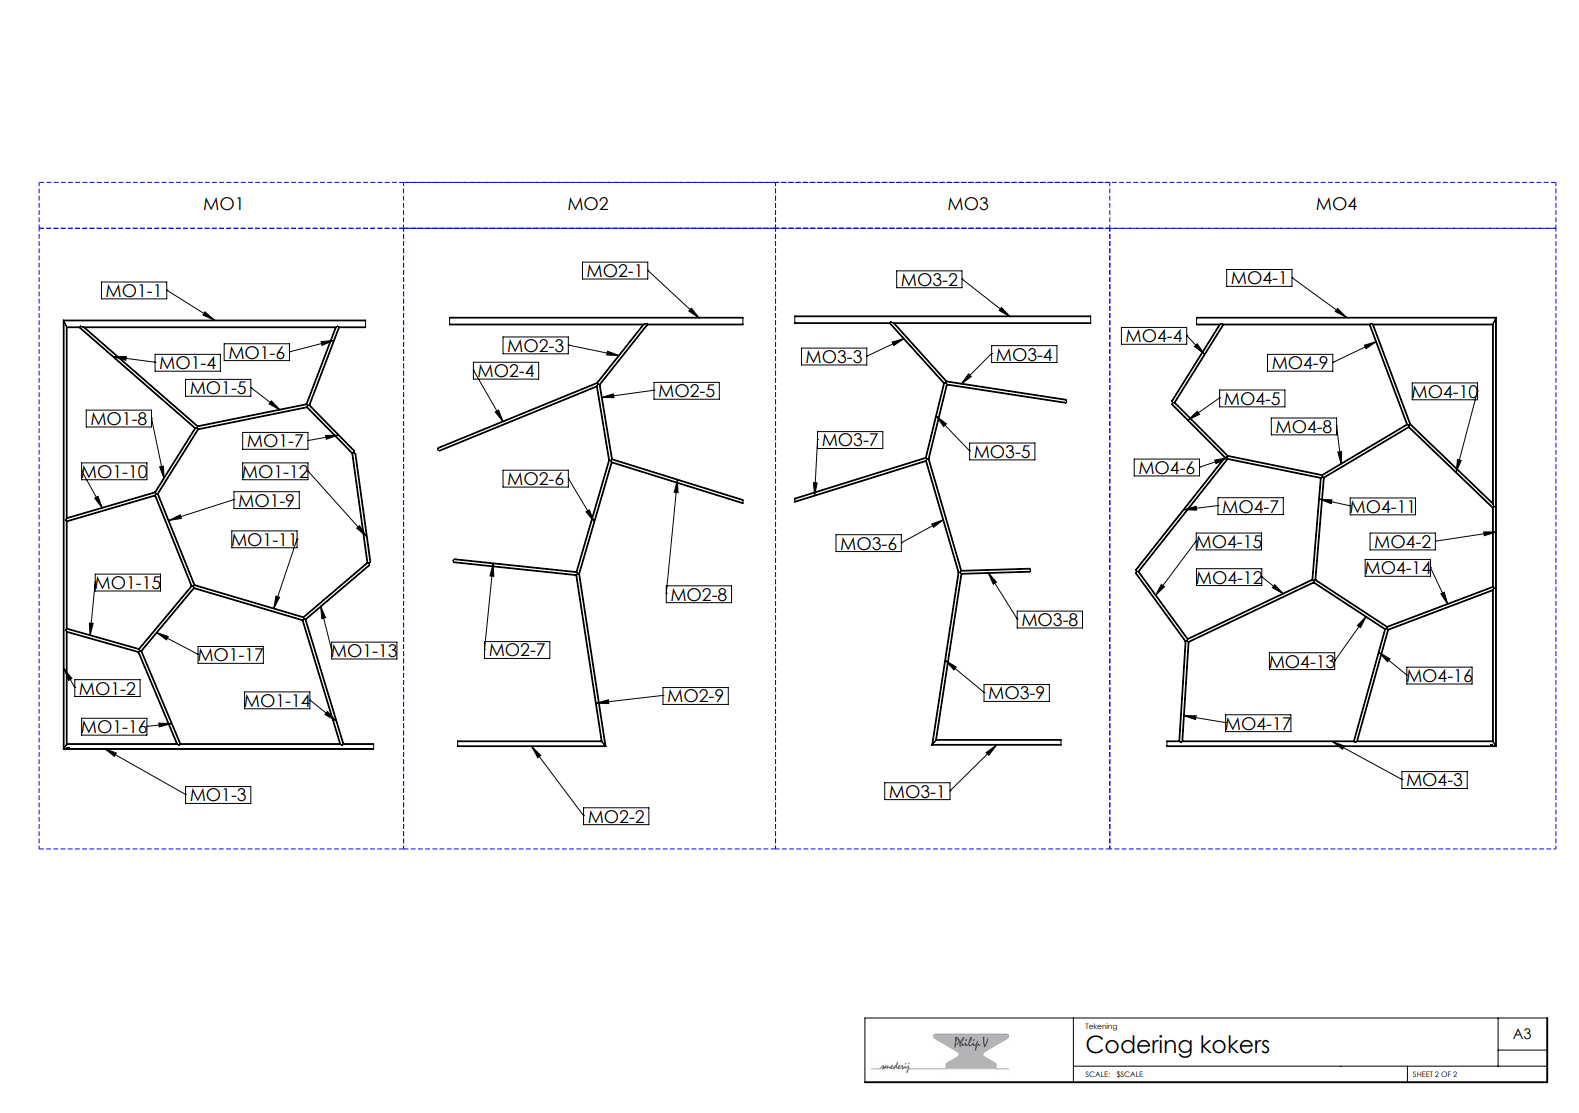
I generated the Voronoi pattern in Rhinoceros using Grasshopper, manually refined the geometry, and imported it into SolidWorks. Using the weldments feature, I developed the full detailed design, controlling cell density, frame connections, sight-lines, and corner transitions through a parametric workflow.
↓ Technical drawing (PDF)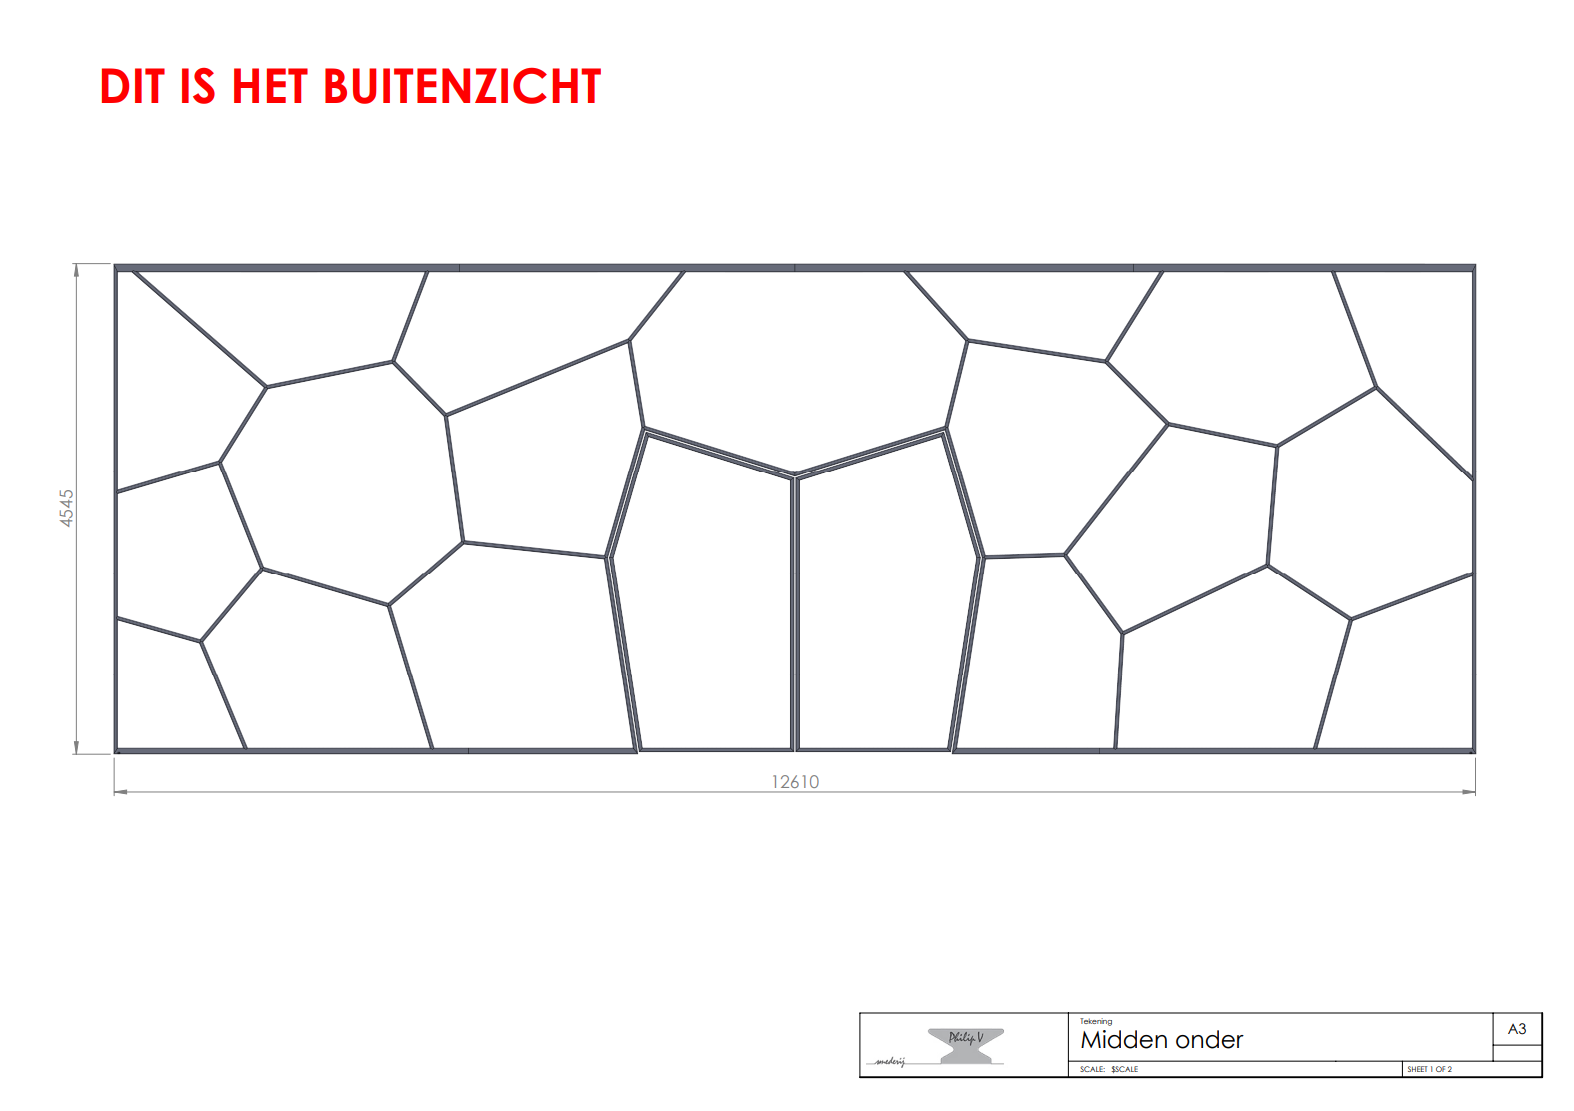
Step 02
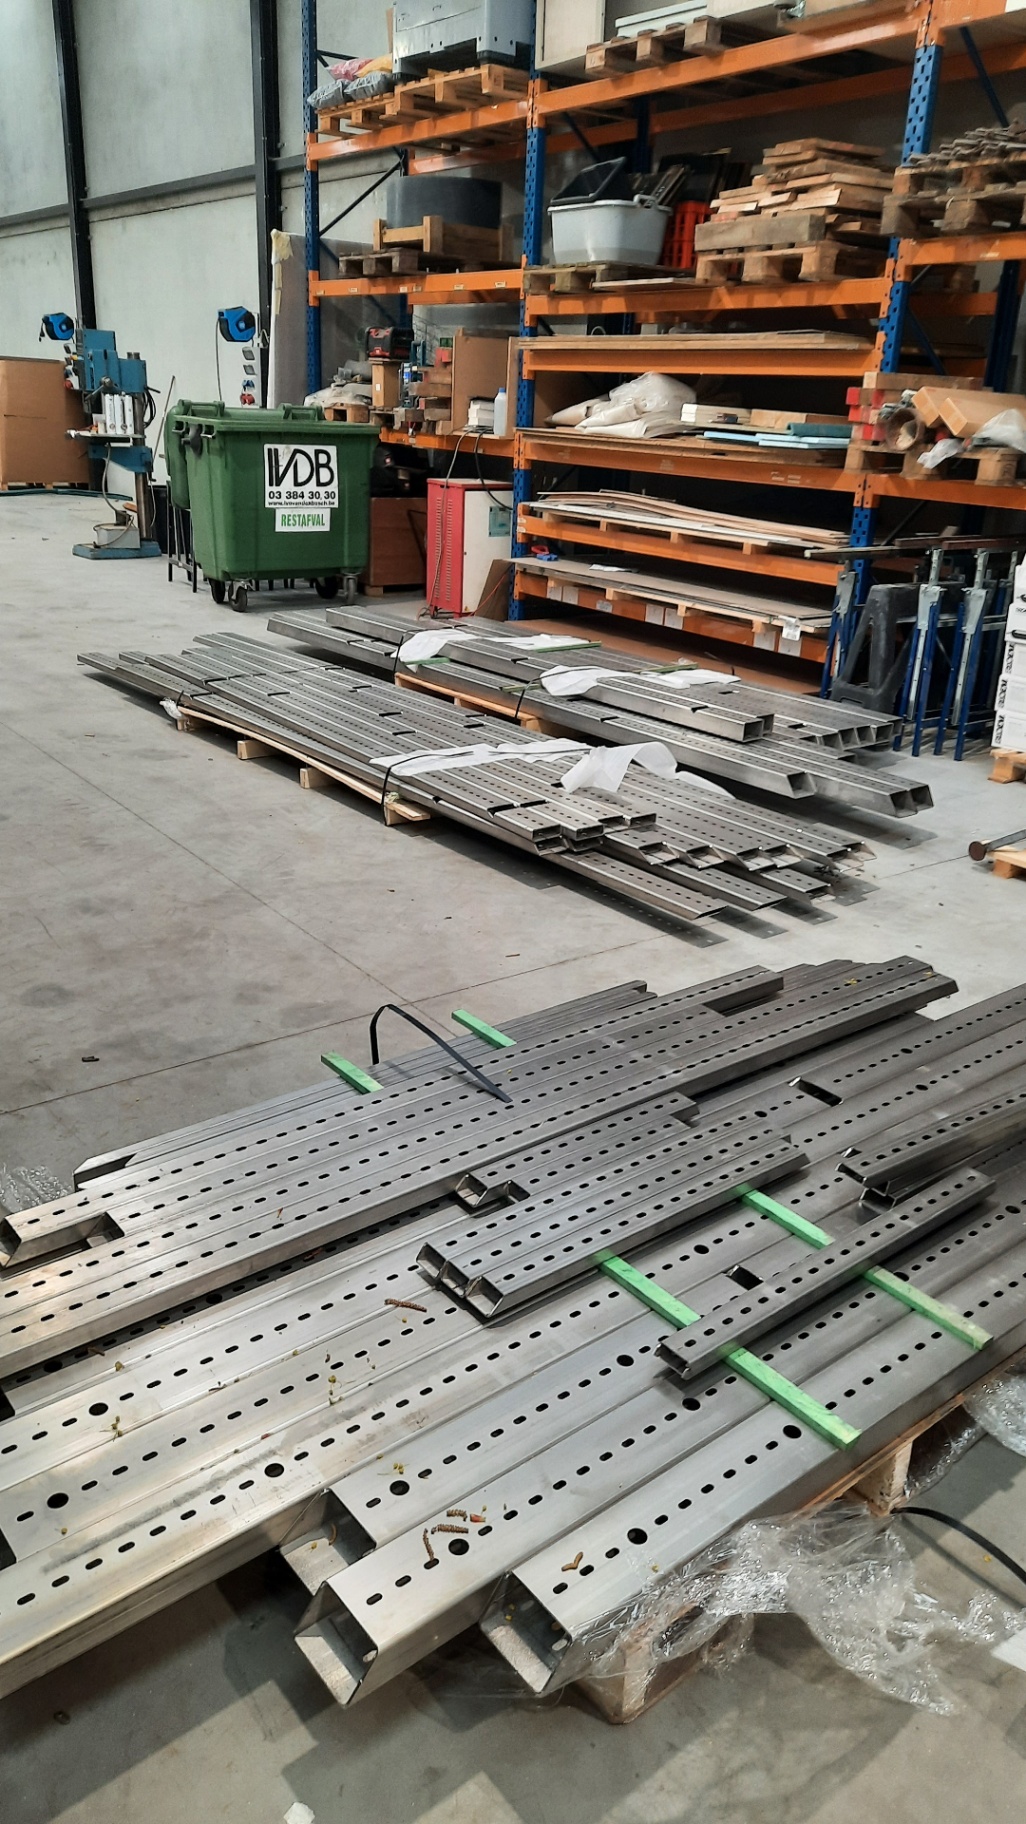
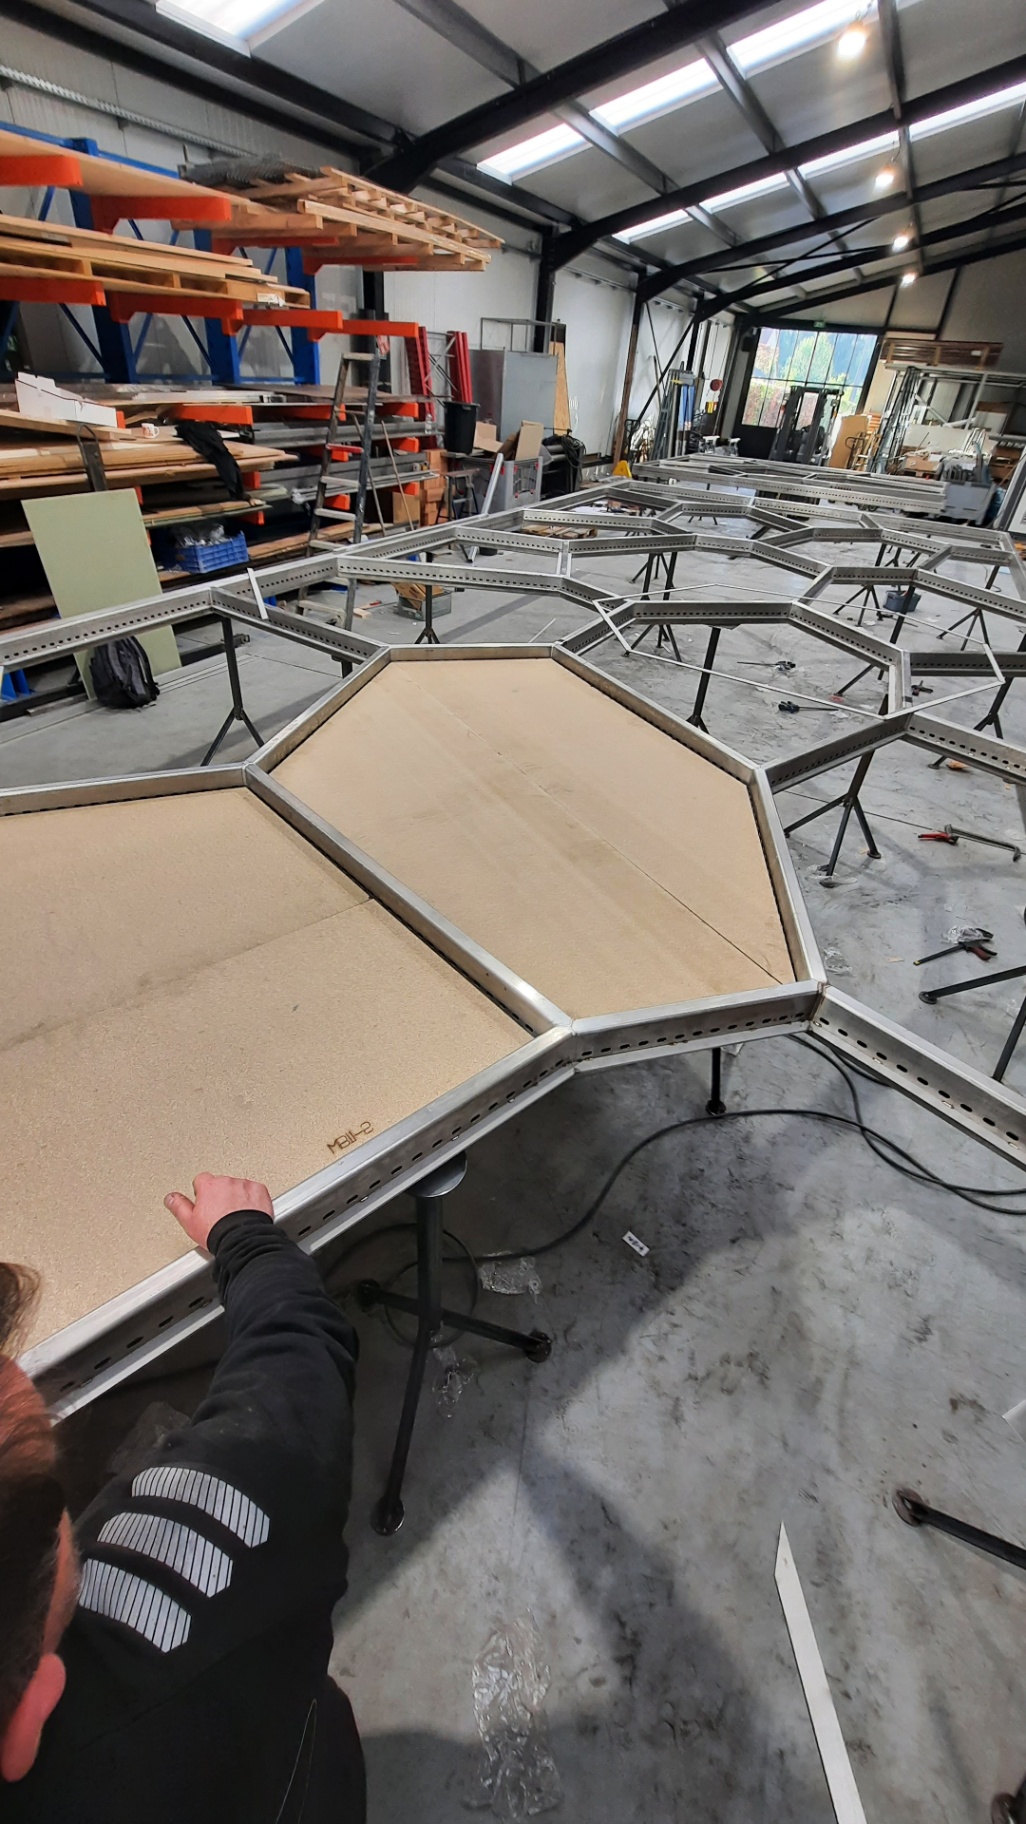
Material
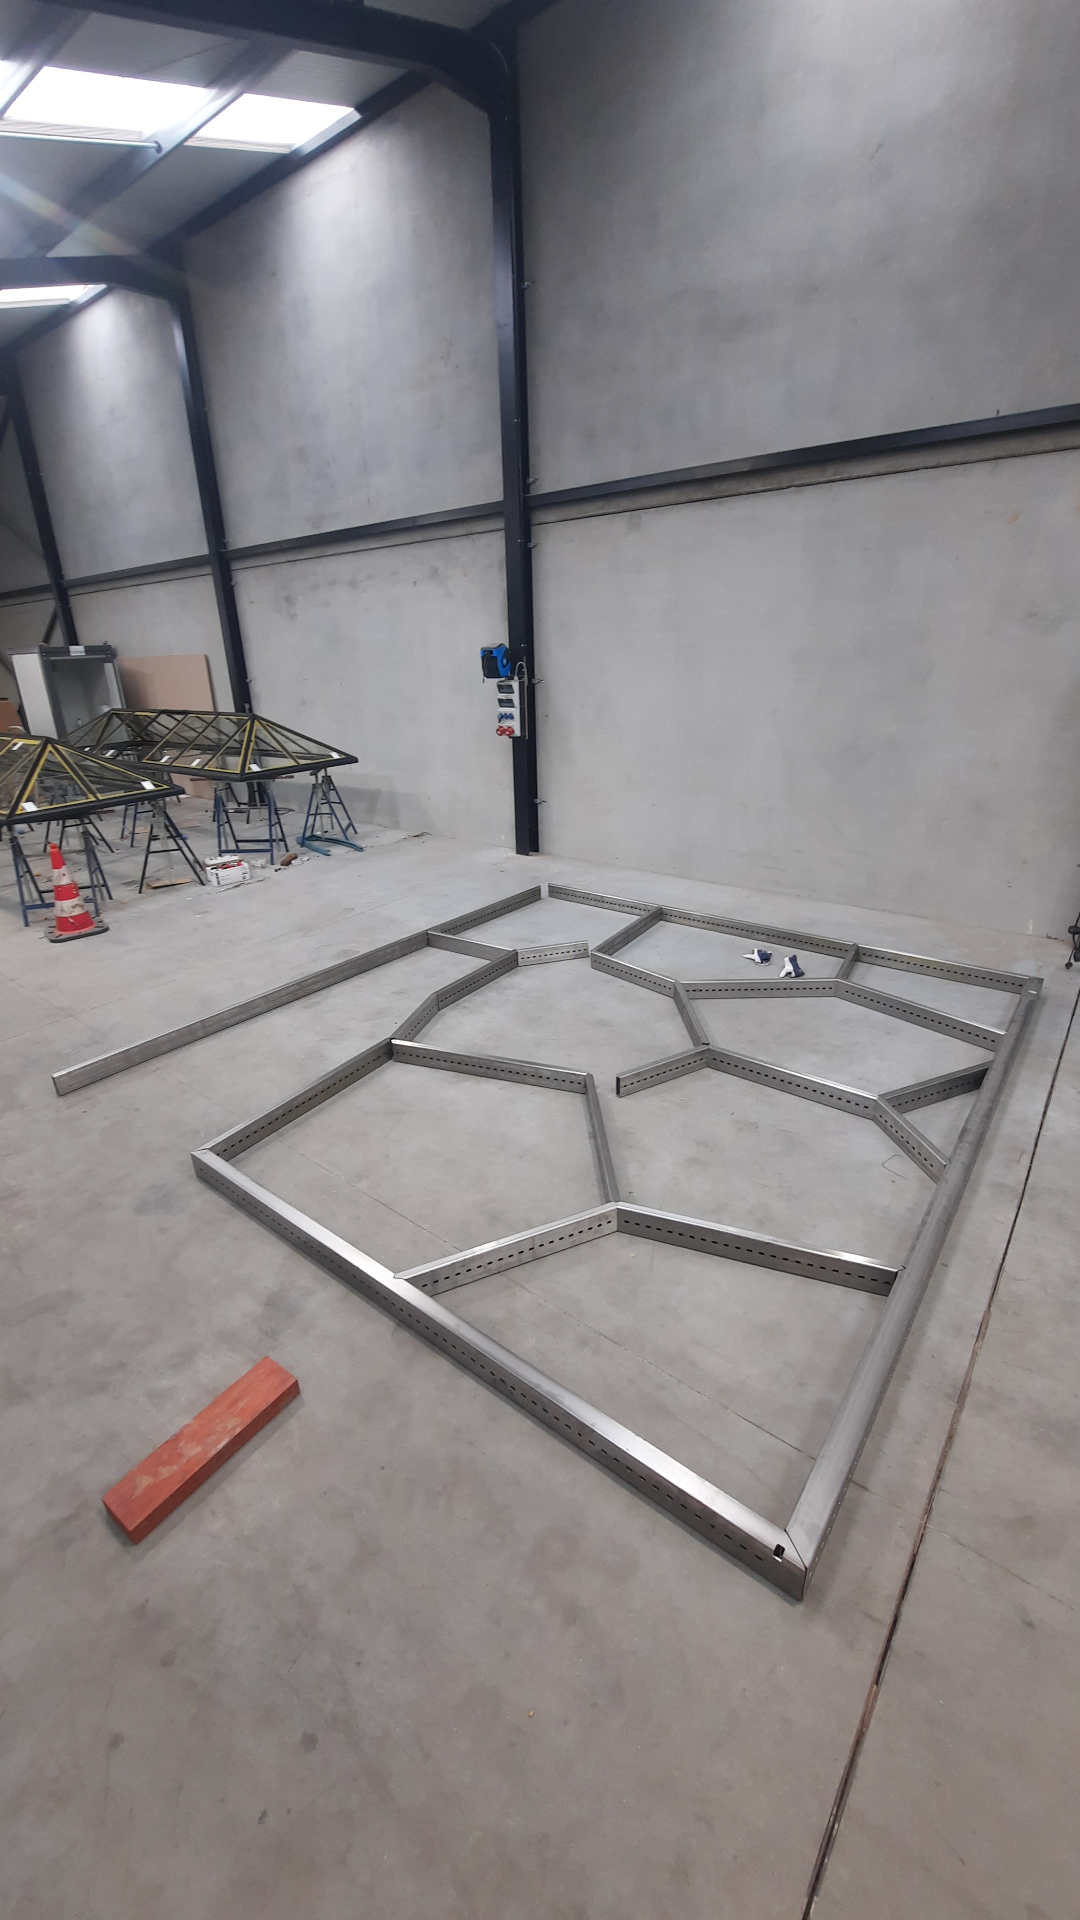
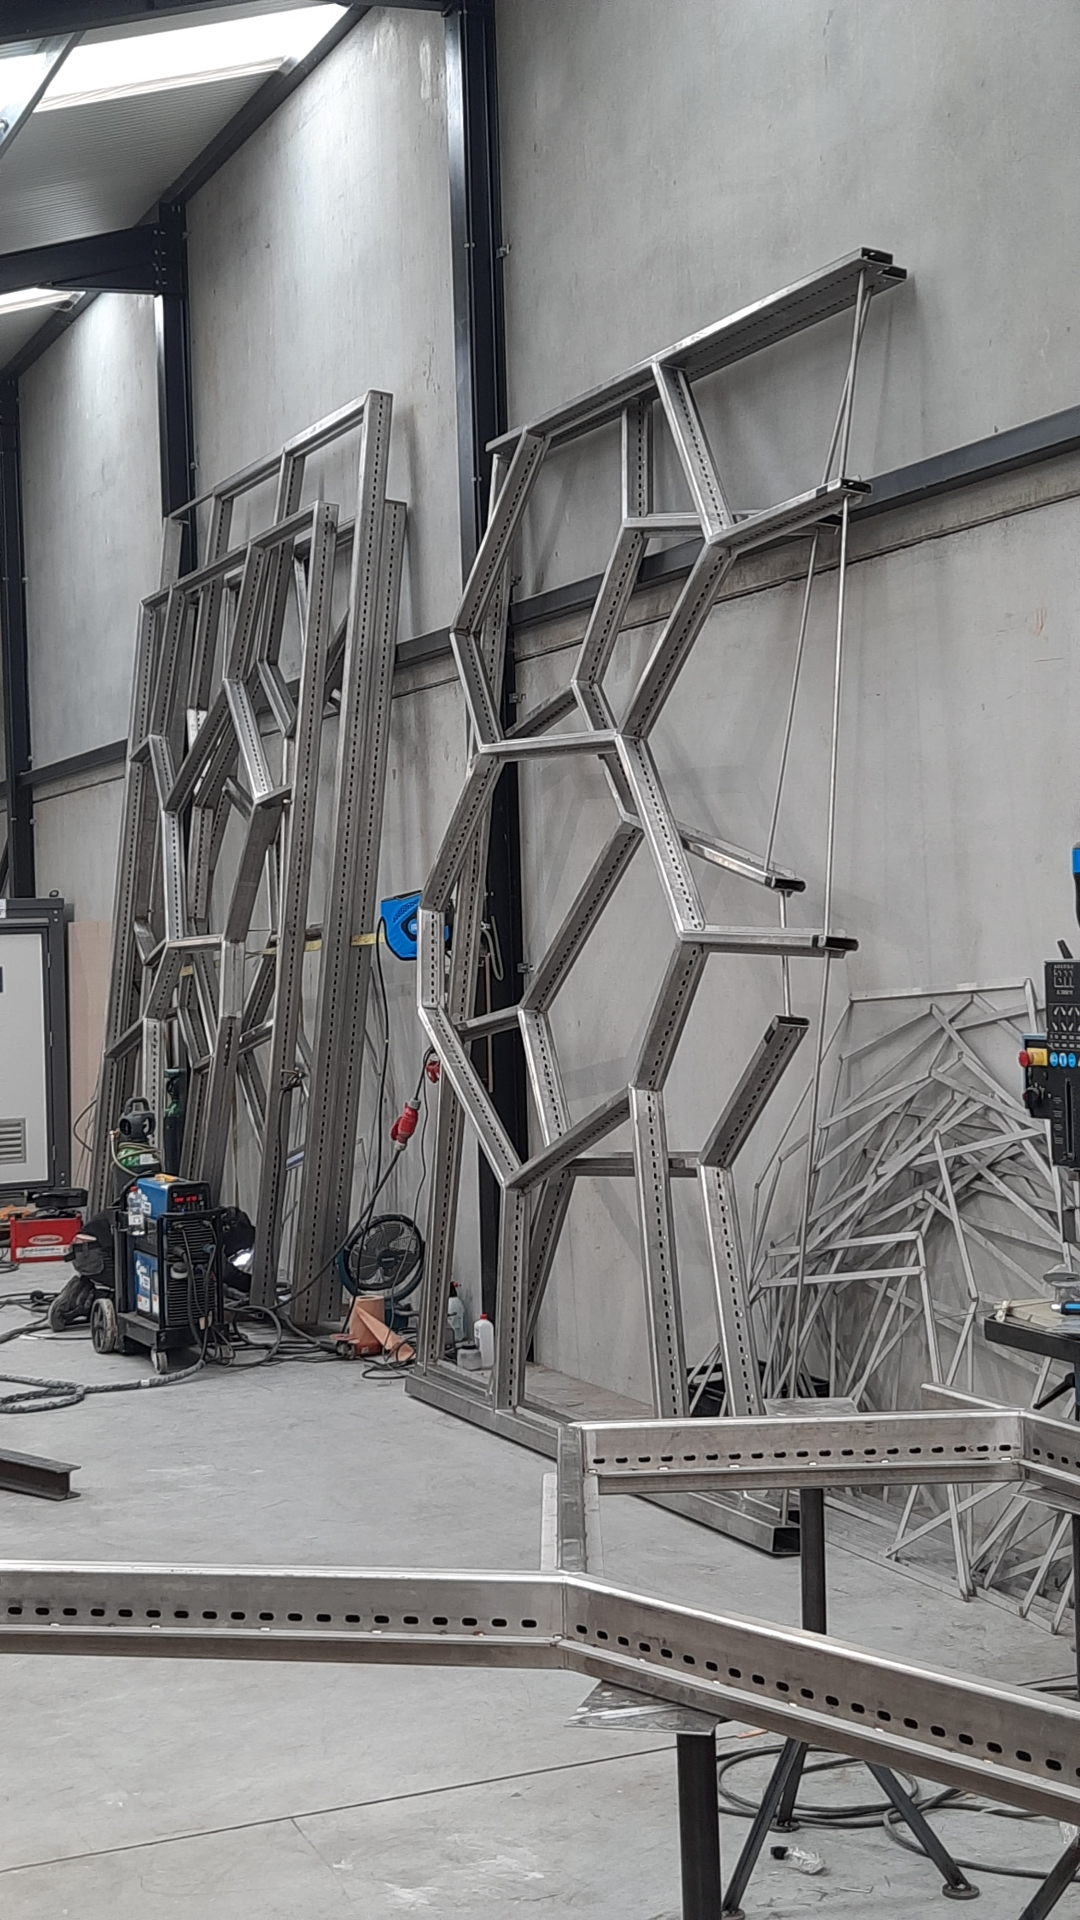
Custom-perforated stainless-steel profiles, delivered in long lengths and sorted in the atelier before any cutting started. Once a section was tacked together we laid it out flat on the floor to check the geometry against the drawing before going vertical.
Step 03
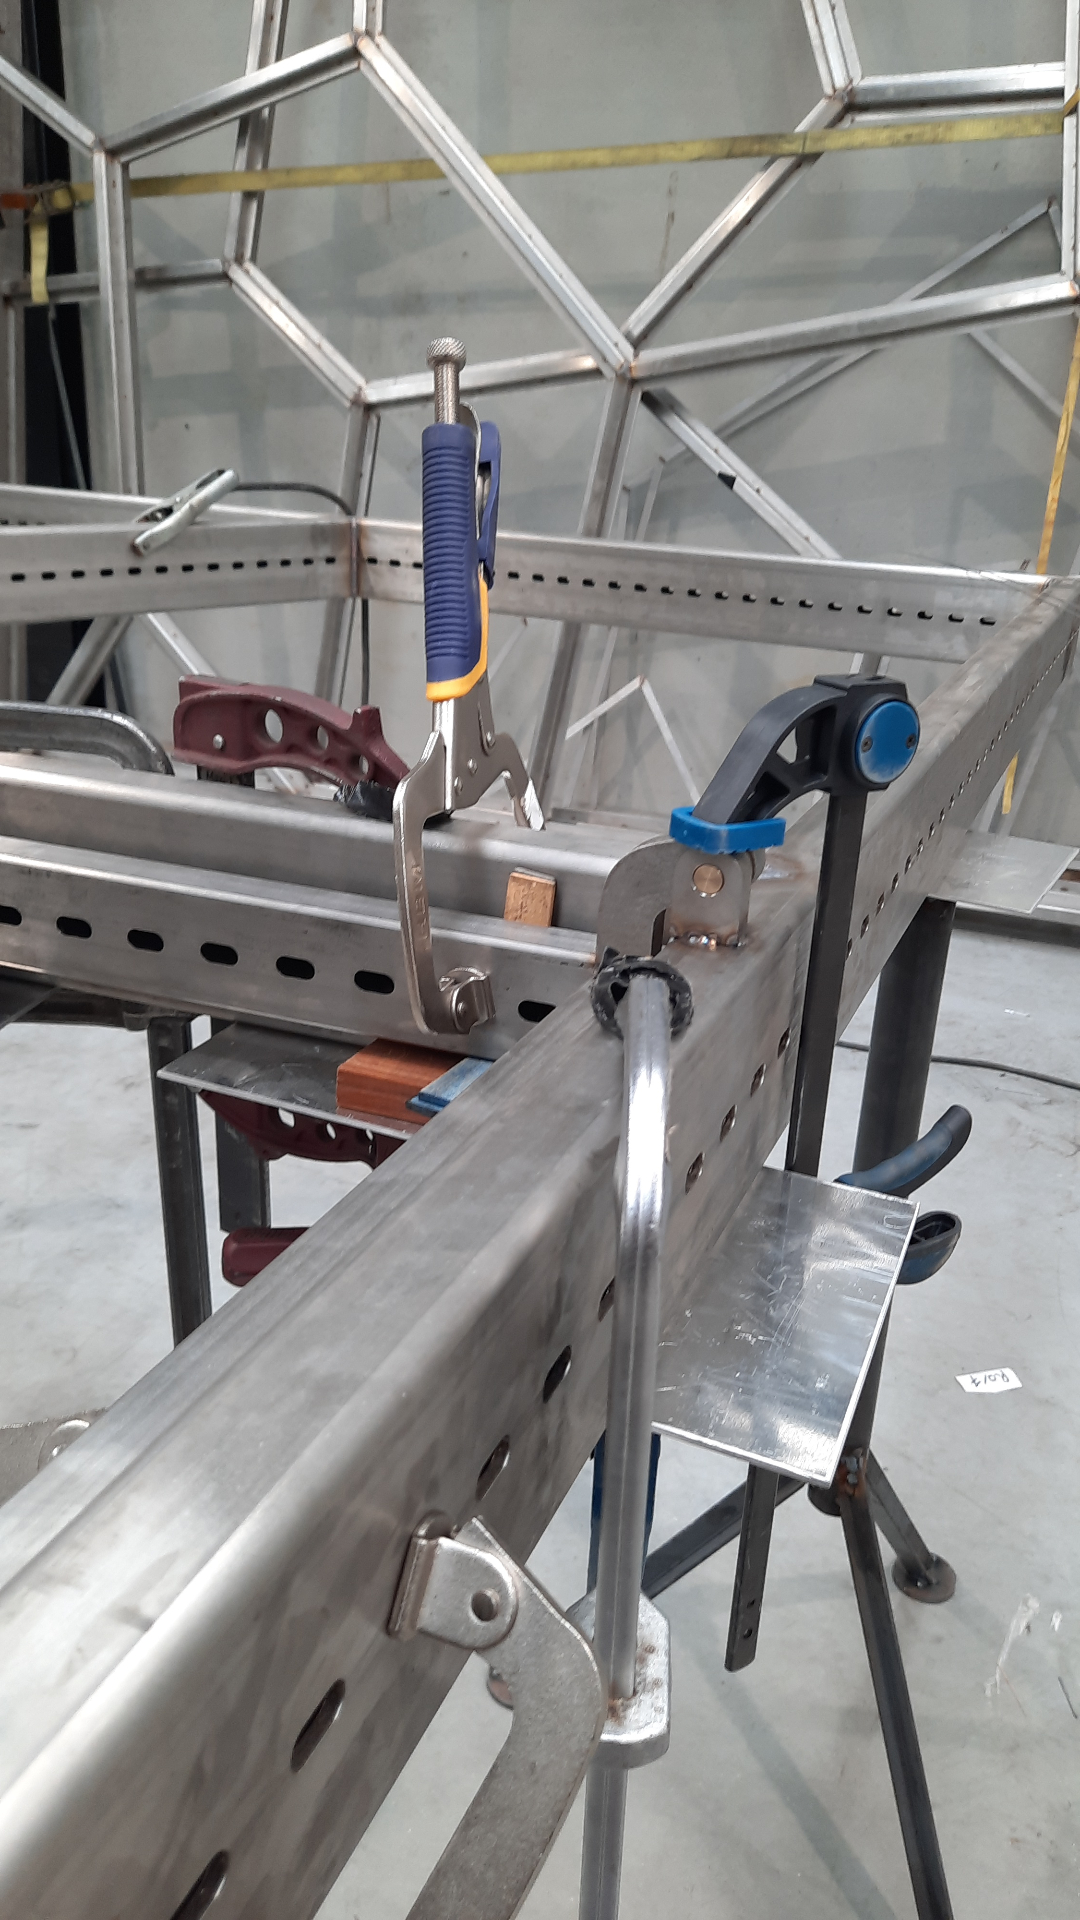
Fabrication
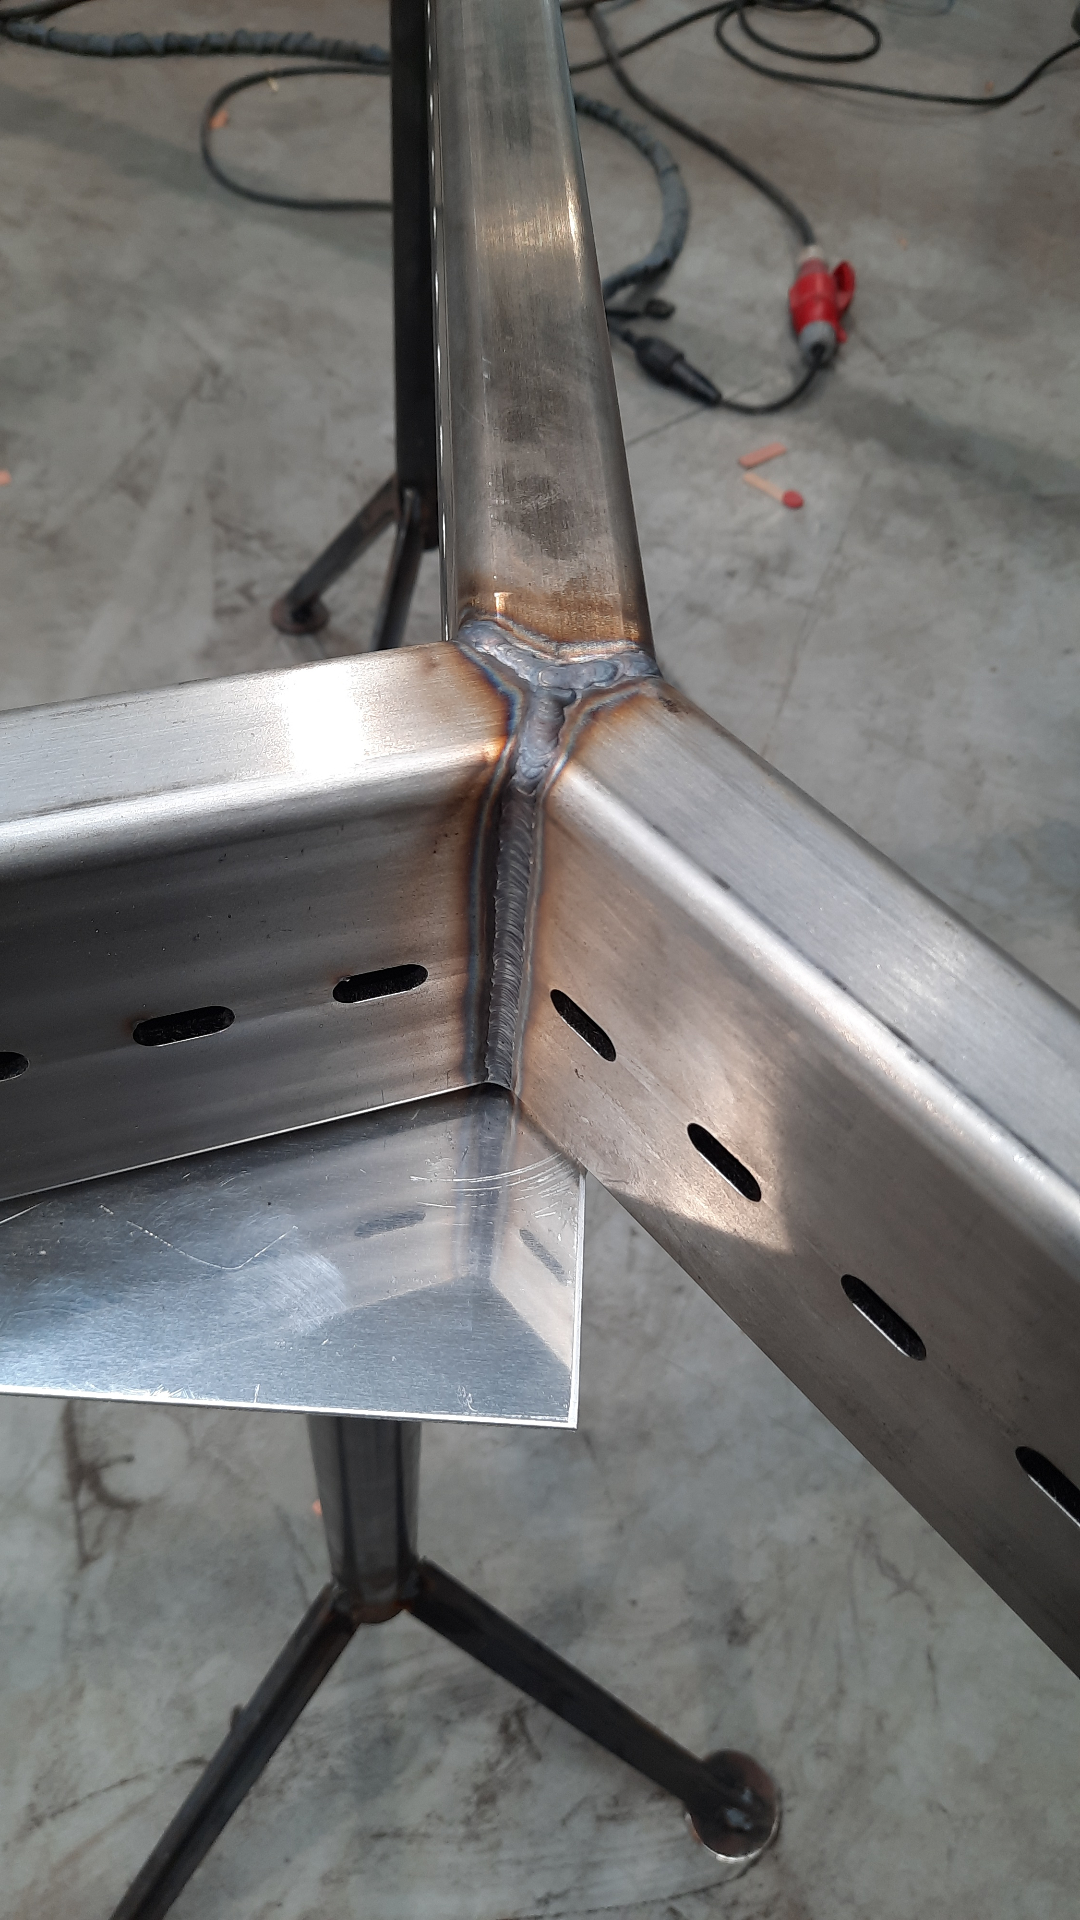
Each cell was jigged, tacked and TIG-welded. The node geometry was the hardest part — three profiles meeting at variable angles, with the weld bead carrying real structural load.
Step 04
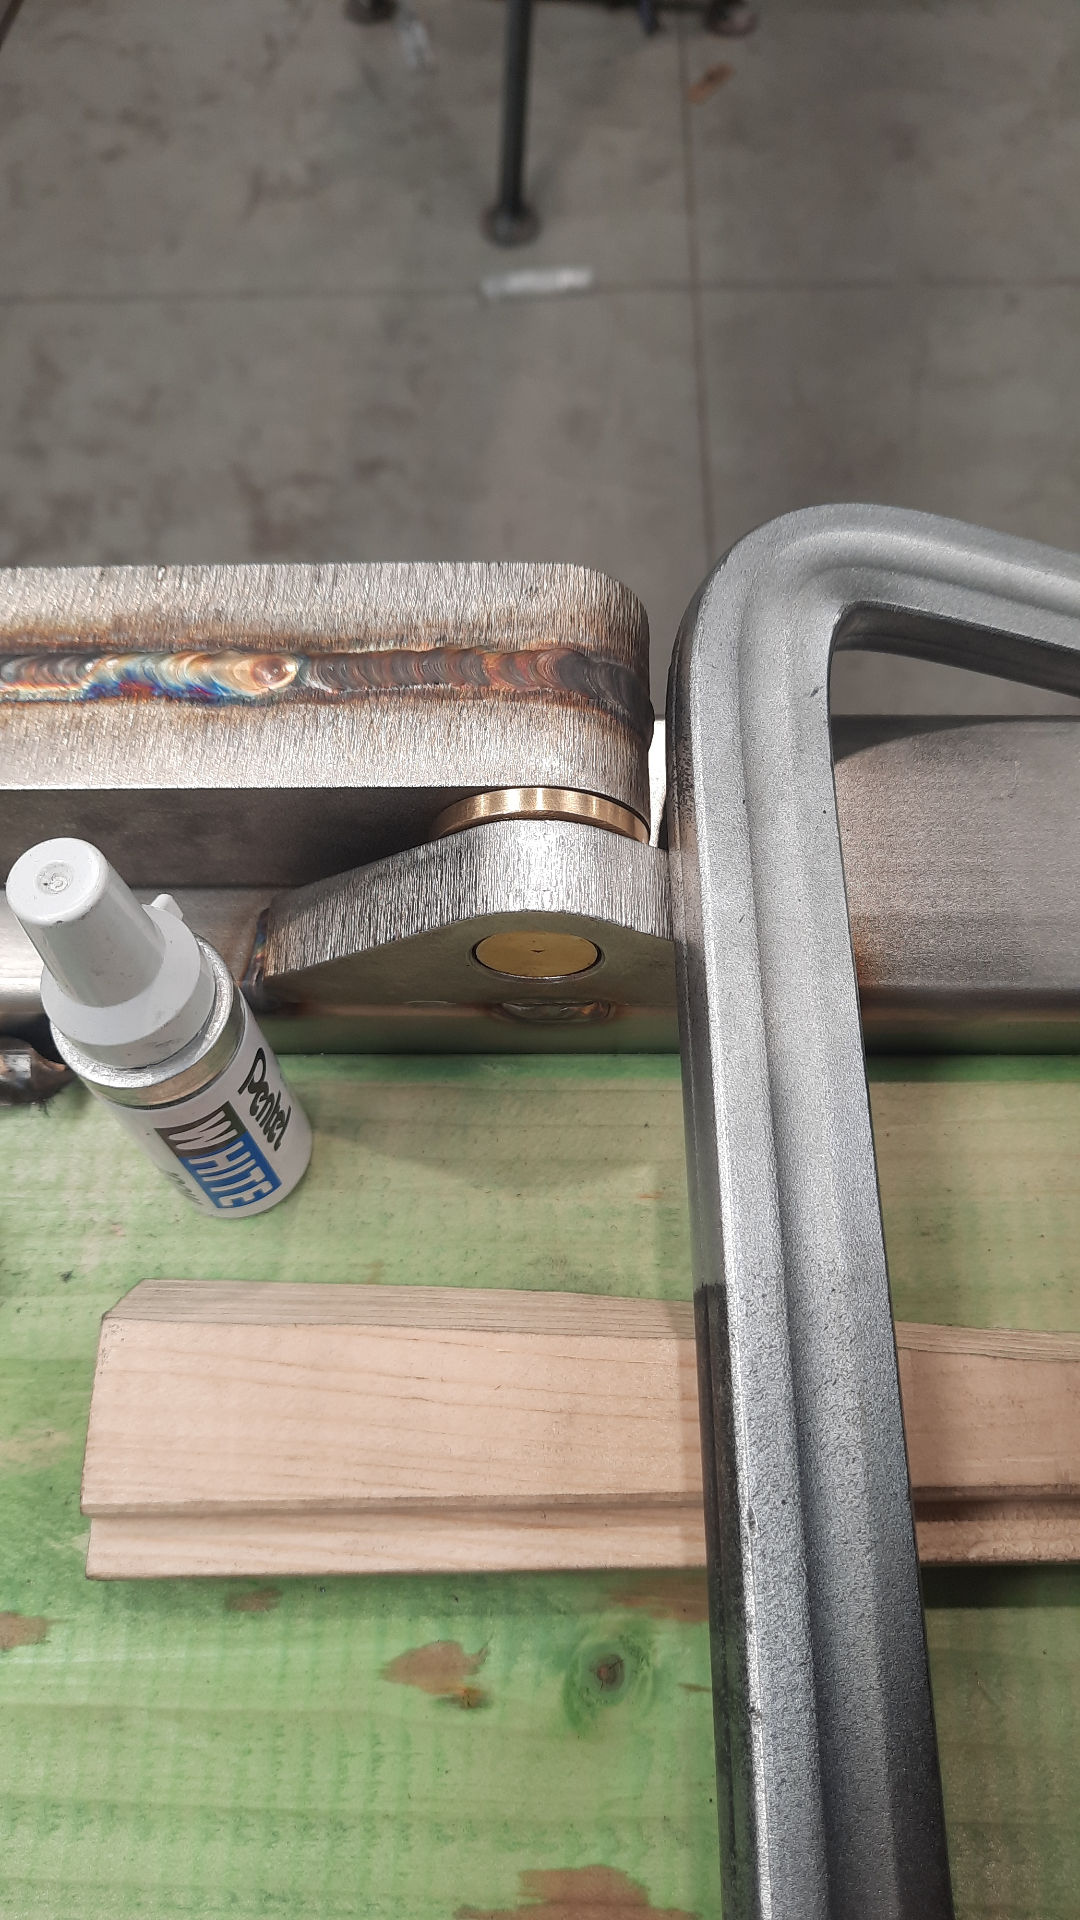
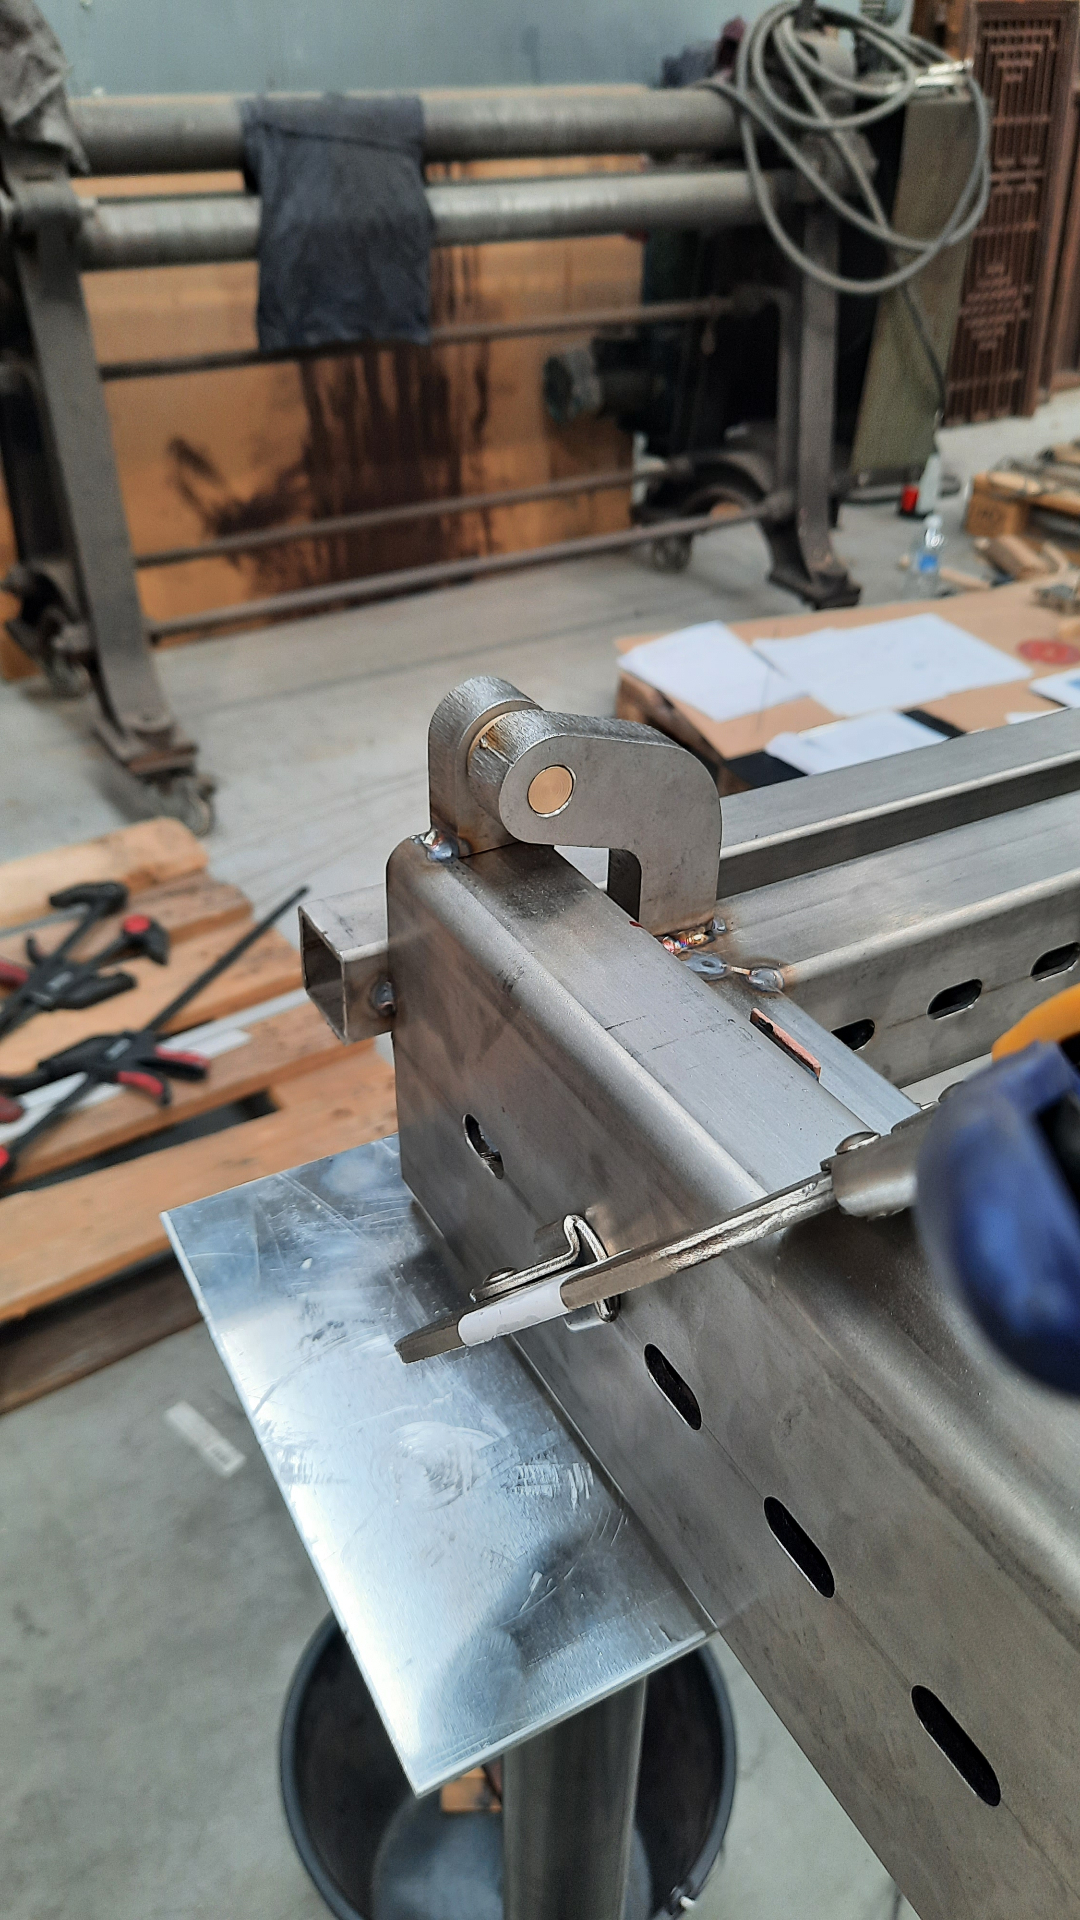
Door hinges
The wall isn't fully fixed — it contains four single doors and one double door so the space behind stays accessible. Each door hangs on a custom hinge with a bronze bushing, sized to carry the weight of a glazed Voronoi panel without distorting the geometry over time.
Step 05
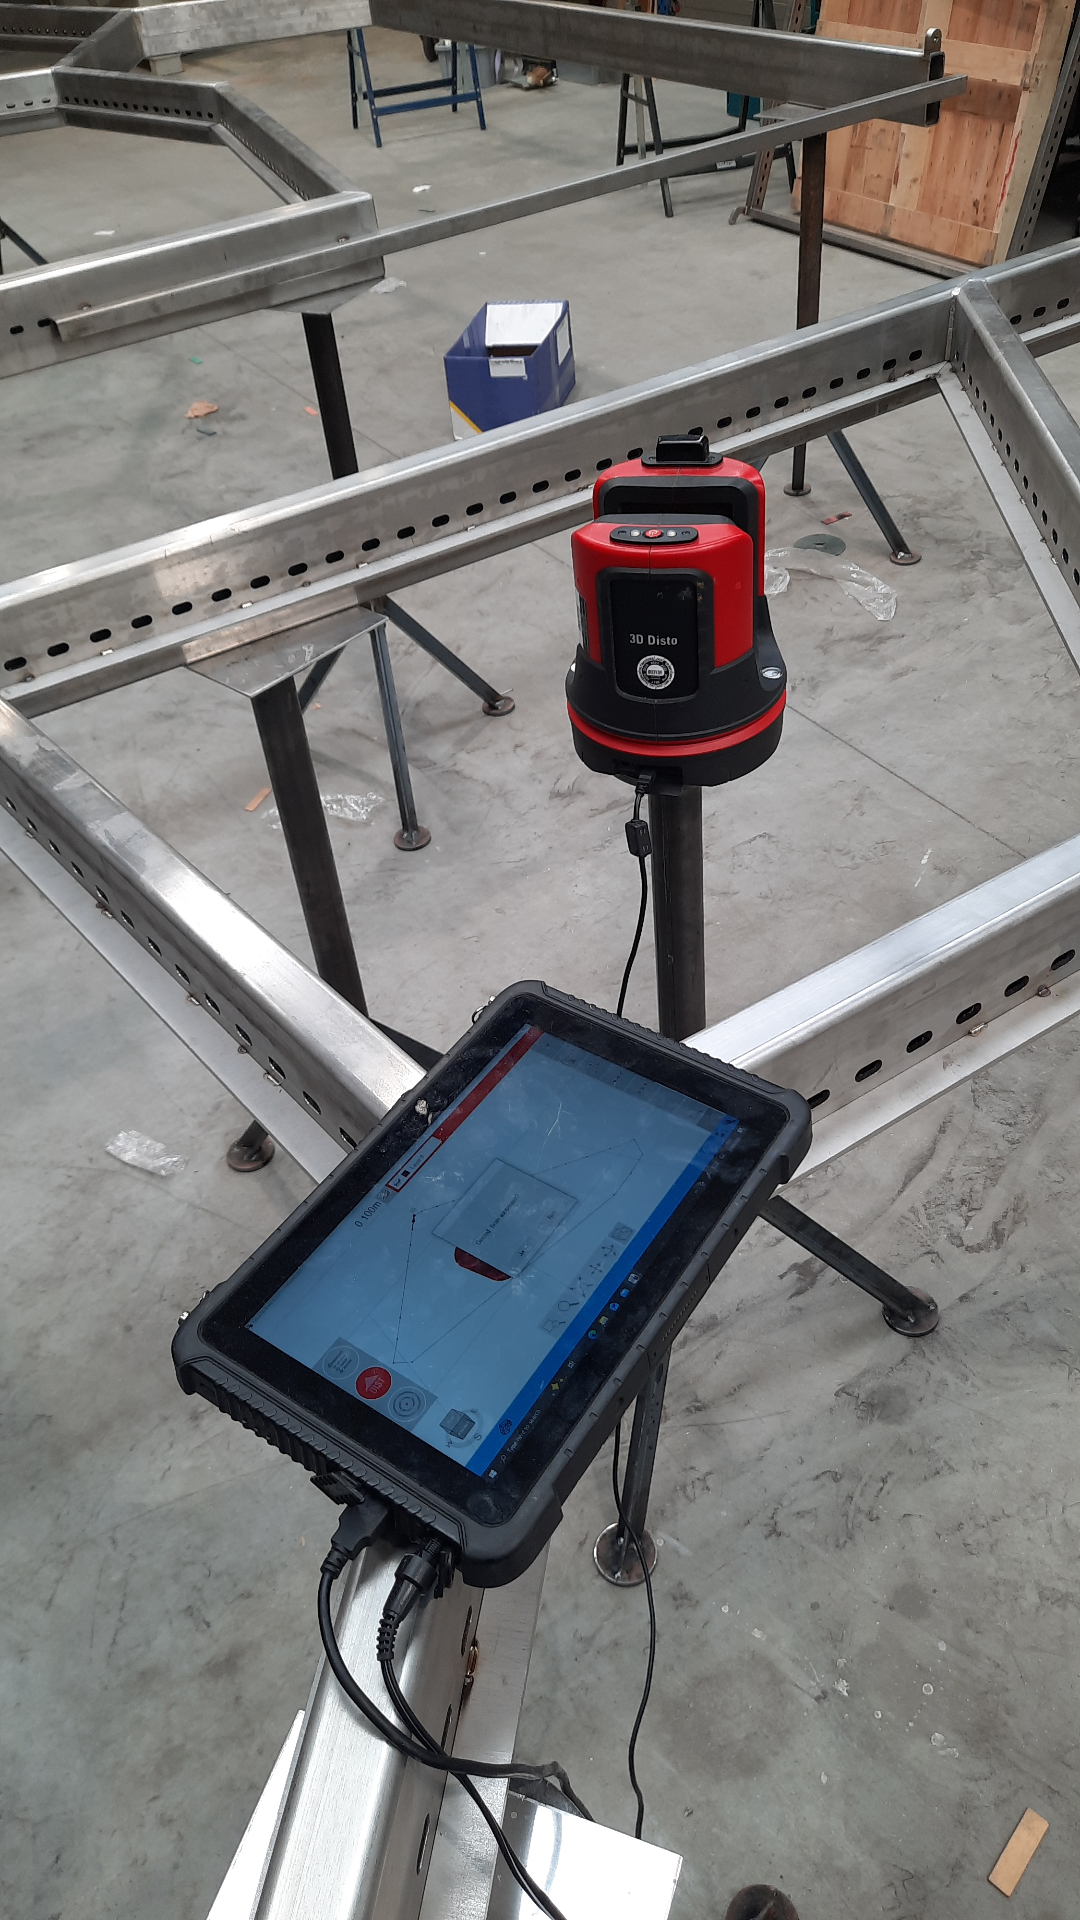
Wood test & Leica survey
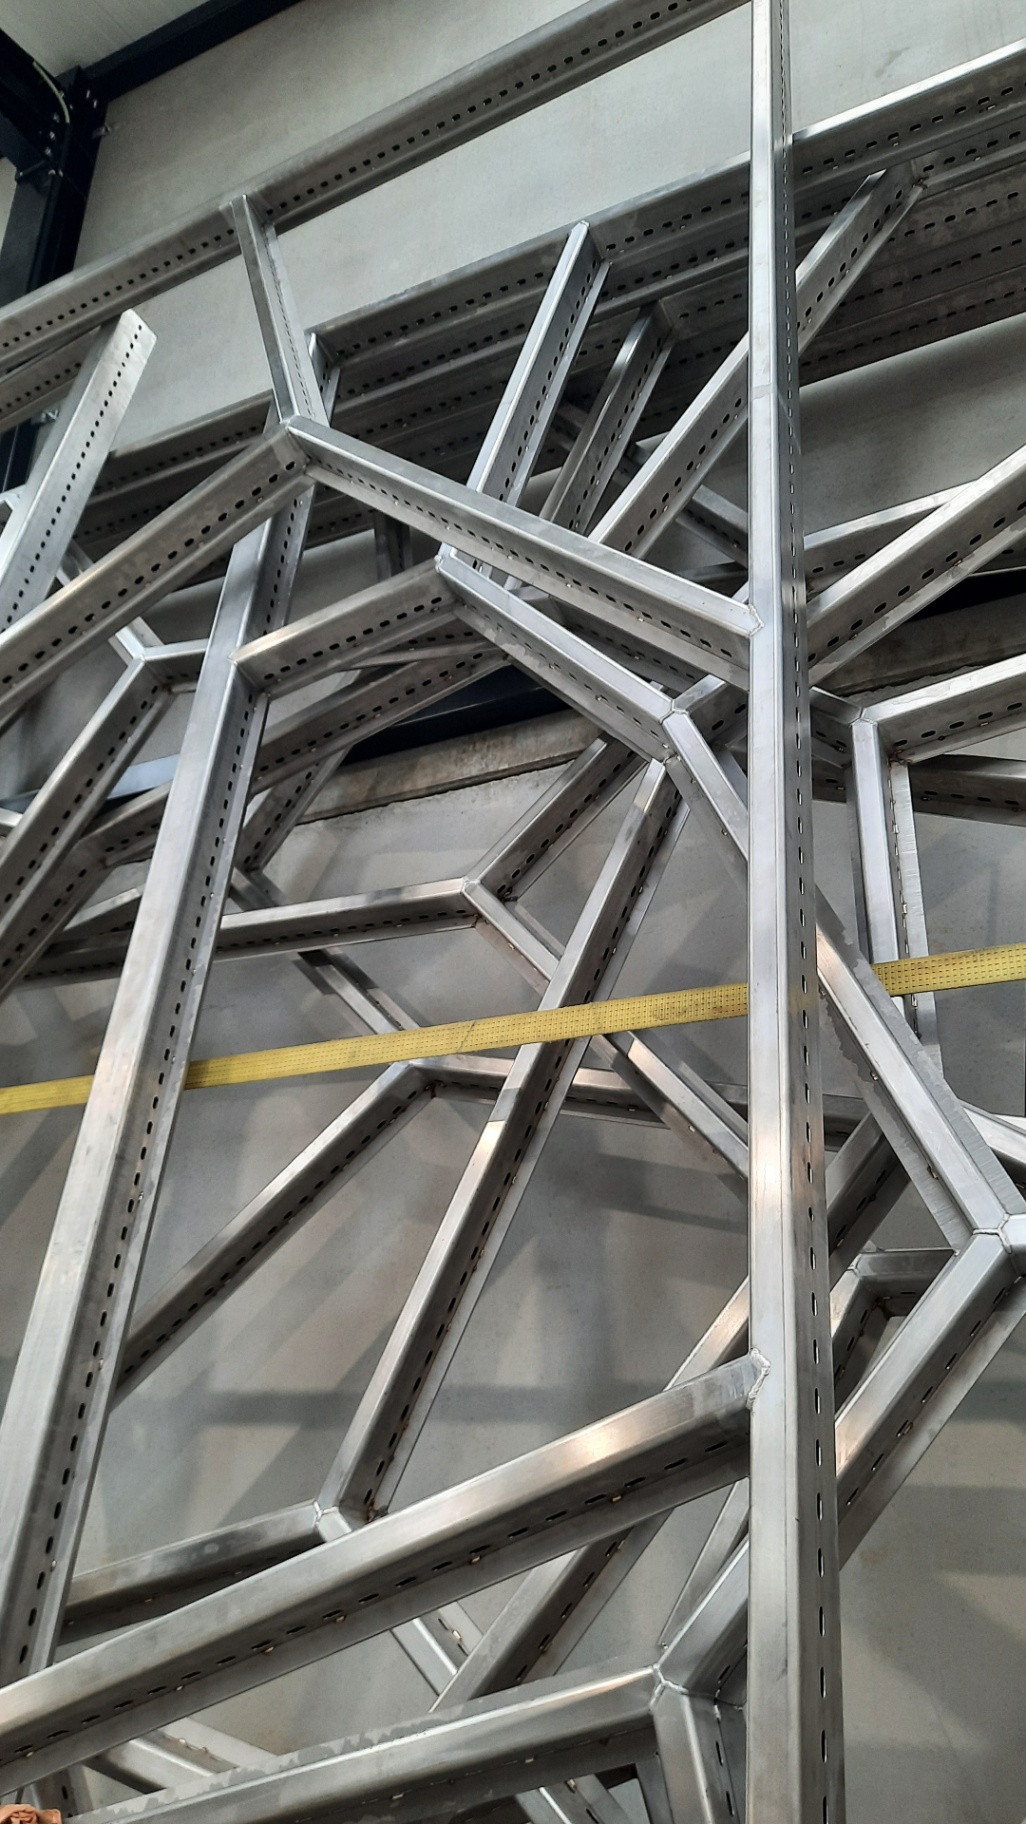
Before cutting any glass we laser-cut every cell shape in wood and dropped them into the stainless-steel frames. The wood didn't fit — the welded cells had drifted just enough from the nominal CAD that off-the-shelf glass would never sit cleanly. That's why we brought in the Leica 3D Disto and measured every single cell individually, so the glass could be cut to the real geometry instead of the drawing.
Step 06
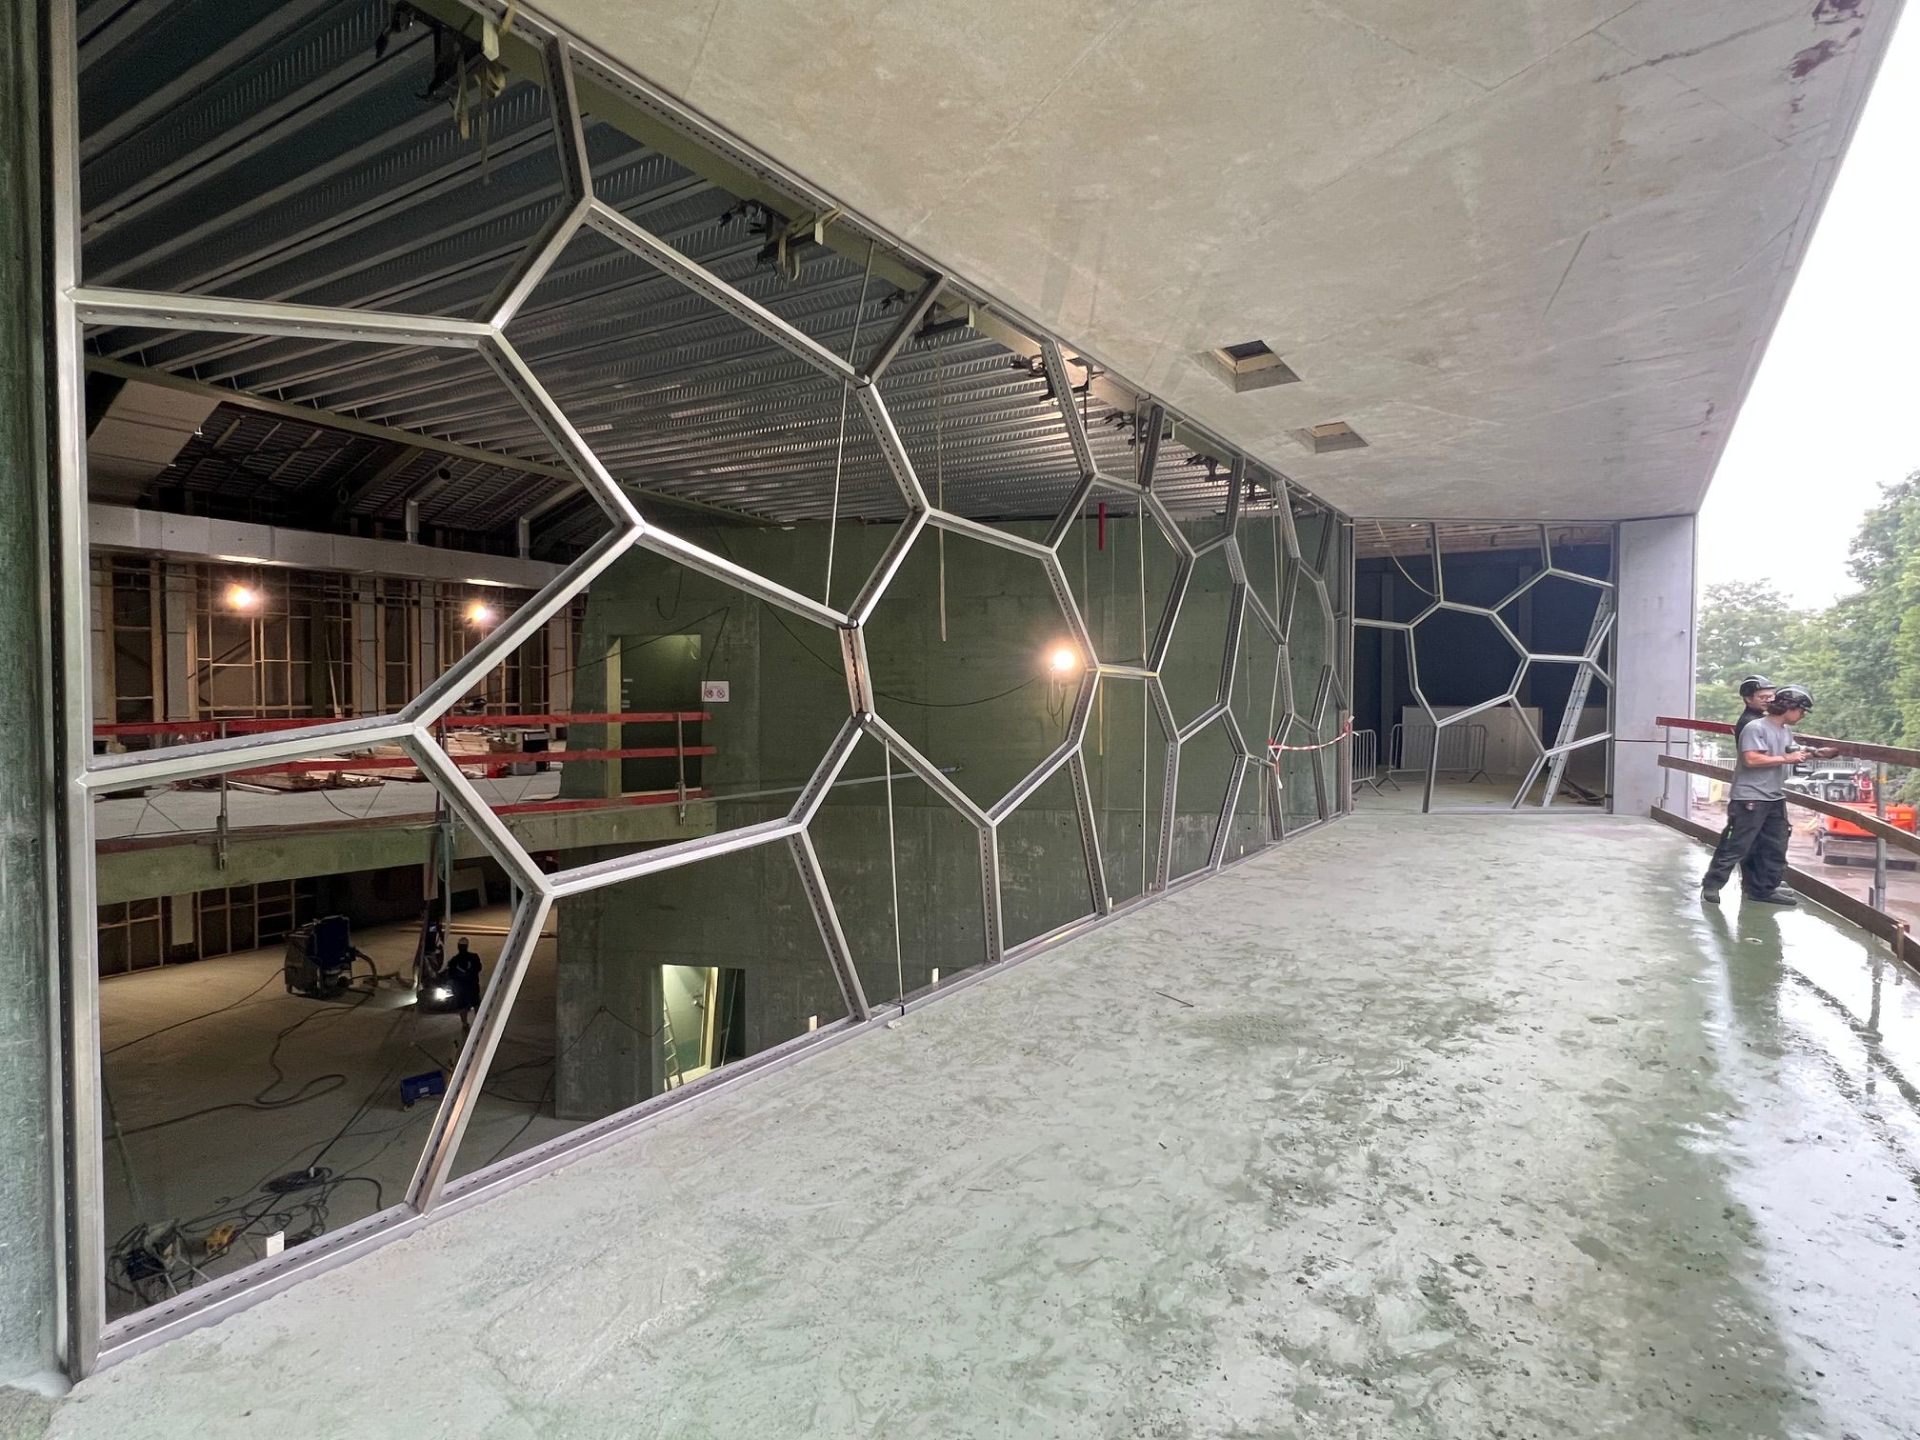
Installation
Installed on site as a full glazed wall. The pattern reads cleanly from inside and outside, and the hinged frames make it serviceable for the lifetime of the building.